Ice Cream Cone Drawing Step by Step
When it comes to Summertime snacks that can cool you down, it's hard to find a better snack than a delicious ice cream cone!
These tasty, icy treats come in many different forms, flavors and variations. This can make it extra fun to learn how to draw an ice cream cone as you have a lot of room to get creative with it.
This guide you're about to go through will show you everything you need to be able to design your own cool ice cream cone drawing.
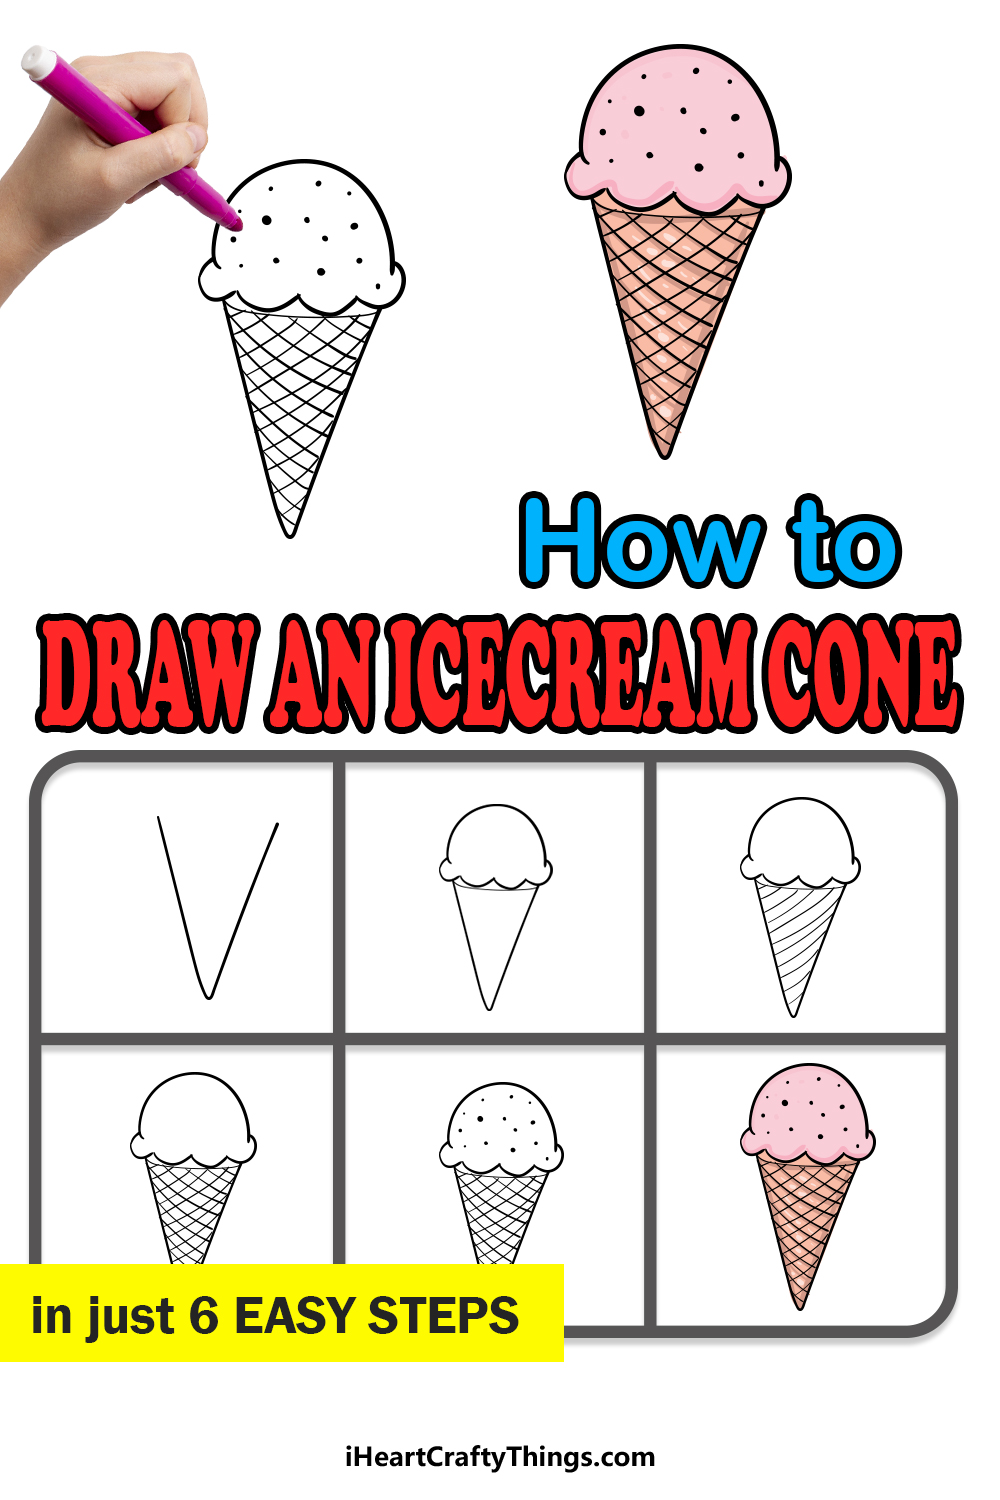
This step-by-step guide on how to draw an ice cream cone in just 6 easy steps will show you how easy and fun it can be!
What's in this Blog Post
- How to Draw An Ice Cream Cone – Let's Get Started!
- Step 1
- Step 2 – Draw some ice cream on the cone
- Step 3 – Now, start adding some detail to the cone
- Step 4 – Finish the design of the cone
- Step 5 – Now, you can add the final details to your ice cream cone drawing
- Step 6 – Finish off your ice cream cone drawing with some color
- Your Ice Cream Cone Drawing is Complete!
How to Draw An Ice Cream Cone – Let's Get Started!
Step 1
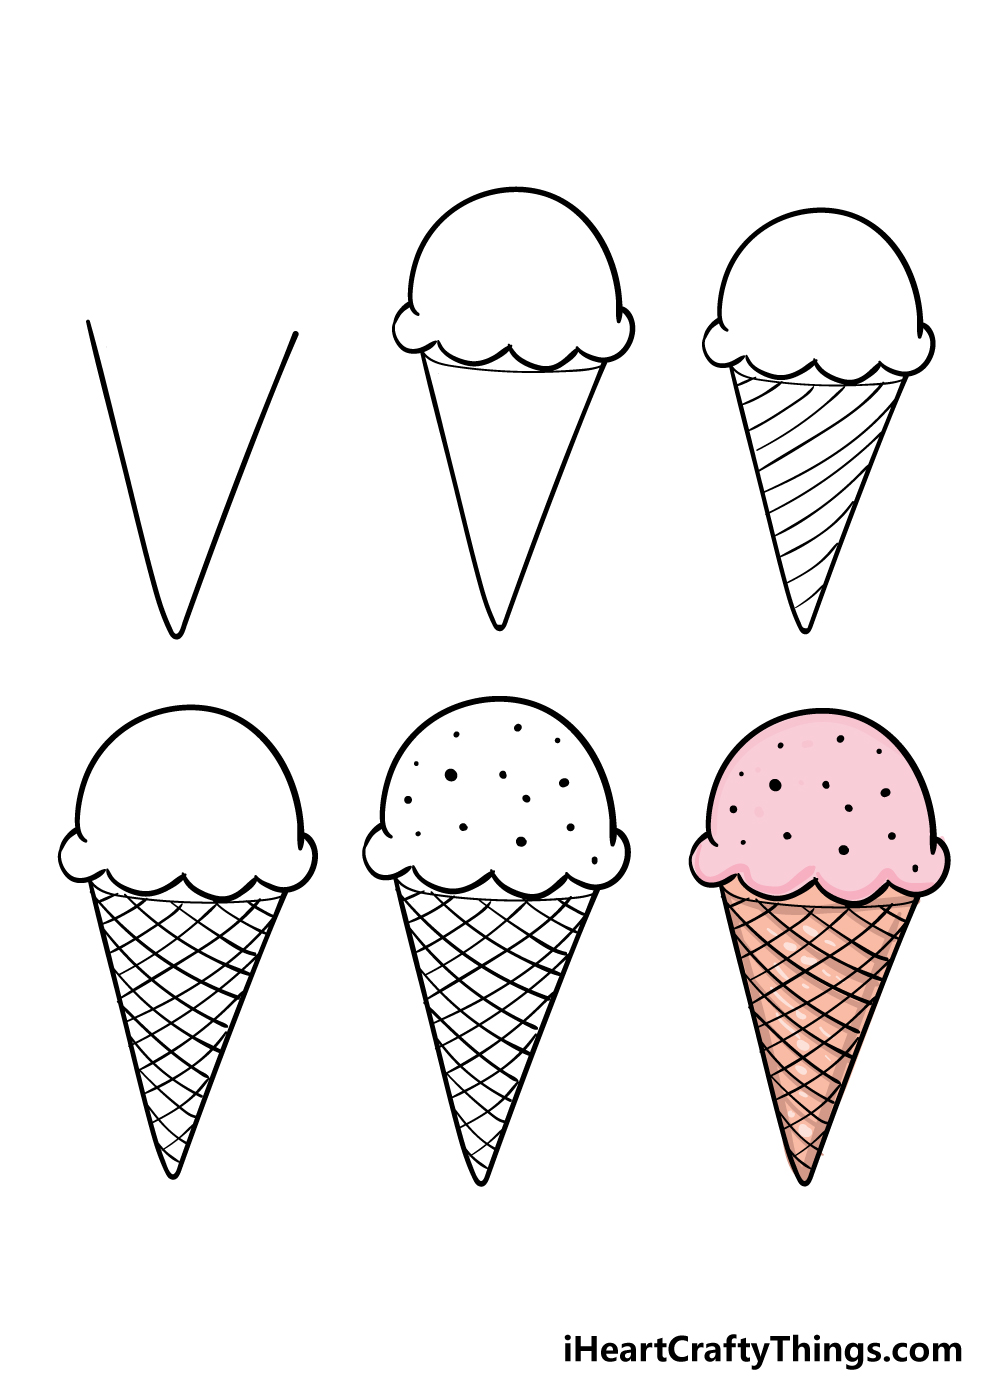
To get this guide on how to draw an ice cream cone started, we shall be starting with the cone part of the equation! This first step will be made much easier if you have a ruler on hand to help you out.
To draw this cone, simply draw two horizontal lines that meet at a slight curve at the bottom of the cone.
This will form the basis of your cone, and we will be adding a lot more detail to it in the next few steps, so let's move on!
Step 2 – Draw some ice cream on the cone
It wouldn't be much of an ice cream cone drawing if it didn't have any ice cream on it! For that reason we shall add some to the image in this second step.
To draw a nice big dollop of ice cream on top of the cone, we shall start with a round, curved line over it.
Then, once you have that top curved line you can add four smaller curved lines underneath it to show that the ice cream is bulging over the rim.
Finally, before we move on to step two you can add a slightly curved line across the top of the cone just under the ice cream to form the top of the cone.
Step 3 – Now, start adding some detail to the cone
We mentioned adding some detailing to the cone in a previous step, so we shall do that in this step of our guide on how to draw an ice cream cone.
For this design, we will be drawing a series of lines going diagonally across the ice cream cone as shown in the reference image. The lines will also go quite closely together.
This step needs a bit of patience and a steady hand, but your patience will be rewarded once the pattern is complete!
Step 4 – Finish the design of the cone
Your ice cream cone drawing is looking great already, but there are just a few more details to add before you can finish it off with some colors.
For this part, we will be finishing the design on the cone itself. You will basically be repeating what you did in the previous step, only reversed this time.
This will result in a sort of cross-hatch design as shown in the reference picture.
This step will also take a bit of patience, but the end result will look really good!
Step 5 – Now, you can add the final details to your ice cream cone drawing
Now your ice cream cone is pretty much done and ready for coloring, so now you can finish off the details in this step of our guide on how to draw an ice cream cone!
This is a step where you can get creative and add some of your own elements if you would like to.
For our example, we used a series of dots to suggest sprinkles and other toppings, but there is plenty you could add to this image.
You could imagine what your idea of the perfect ice cream cone is and recreate it in your drawing.
Maybe you could add some cherries or pieces of candy onto it, and you could also draw a cool background for your ice cream cone.
What toppings and details would you add to your ice cream cone to make it perfect?
Step 6 – Finish off your ice cream cone drawing with some color
That brings us to the final step of your ice cream cone drawing, and it's a fun step! Drawing the ice cream cone and adding your own toppings and variants is just one part of how you can personalize it.
The colors and art mediums that you choose have a big impact on the feel of your picture, so this is a step where you should really let your creativity flow!
Ice cream cones can come in all manner of bright and beautiful colors, so there's no limit to what you can do!
You could use some colored pens and bright markers to really make the colors pop! If you'd like a less vibrant image, then you could use some watercolor paints or colored pencils for a more muted look.
If you have some crafts and stickers, then using them as the toppings on the ice cream would help give it a cool 3D look!
Your Ice Cream Cone Drawing is Complete!
With that, you have successfully completed this guide on how to draw an ice cream cone!
We hope that by having some easy and more manageable steps to follow you were able to breeze through this guide and end up with an awesome picture!
We also designed this guide to be easily customizable so that you can create your own unique ice cream cone designs.
We can't wait to see how creative you get with this image, and we're sure to see some incredible designs!
With some extra details, your own toppings and maybe a background, there are so many ways that you can put your own spin on the drawing to create your perfect ice cream cone.
When you're ready for a new drawing challenge, be sure to head to our website, as we have tons of drawing guides like this one for you to enjoy.
We also upload new guides constantly, so be sure to check in often to never miss out!
We would love to see your cool ice cream cone drawing when it's done, so please be sure to share it on our Facebook and Pinterest pages for us to see!
Ice Cream Cone Drawing Step by Step
Source: https://iheartcraftythings.com/ice-cream-cone-drawing.html
0 Response to "Ice Cream Cone Drawing Step by Step"
Post a Comment